✍️ Last modified on April 10, 2023
That’s it! You have an idea for a niche to create your first site. You see how to monetize it and what kind of articles you will publish on it. You’re on your way to generating your first money online! 💰
But before that, you will have to create a WordPress site . And when you start on the Internet, you can quickly get discouraged by every technical aspect. So you can postpone your project until later(forever?). ☠️
Don’t worry dear Maker, because you are in the right place. In this article, you will find :
- a step-by-step guide to creating a WordPress site;
- the best tips to get started on the right foot;
- everything you need to know to become more independent;
Don’t hesitate to follow the steps one after the other while reading this guide. We have written it to support you during the creation of your website. 🏗️
Join 10,000+ makers and get all our latest tips for making a living from Blogging and Affiliate Marketing.
Contents
- What is WordPress?
- How much does a WordPress website cost?
- The 9 steps to create a WordPress website
- Step 1: Choose & buy a domain name
- Step 2: Subscribe to a web host
- Step 3: Install WordPress on your host
- Step 4: Understanding the WordPress Interface
- Step 5: Choose a WordPress theme and install it
- Step 6: Make the general settings of the site
- Step 7: Customize the website
- Step 8: Install plugins
- Step 9: Add content
- How to attract visitors to your WordPress site?
What is WordPress?
WordPress is a CMS, which means a content management system. In more understandable language, this means that it allows you to create a website more easily.
Thanks to it, you will offer your visitors a quality site even if you are a beginner and you don’t know how to code. And the possibilities are endless: blog, online magazine, showcase site or ecommerce.
Ain’t life grand? 🌸
Be careful not to confuse WordPress.com with WordPress.org:
- The first version is a turnkey formula, a bit like the Skyrock or Bloggers blogs;
- The second one allows you to access the free version of WordPress and to modify it as you wish;
On our side, we 100% recommend you to use the free version for technical reasons, but also for referencing.
So you’re probably wondering…
How much does a WordPress website cost?
Using the free version of WordPress does not mean that everything is free. You will have to buy a domain name and a hosting to install your WordPress version.
To give you an idea, by going through O2Switch which offers you an offer including :
- a free domain name for one year ;
- and a shared hosting for all the people you want to add on it for one year;

➡️ This amounts to 72€ TTC per year. To which you add 9,99€ each year for the renewal of your domain name.
In other words, you can launch a WordPress site for less than 100€ per year. And what’s great is that you can launch others for only 9,99€ per year since you already have a shared hosting allowing you to host them. 👍
You can also choose a paid theme. It’s simply one or more templates that give you a more attractive or organized look and feel to your content.

In this case, we recommend that youinvest in a “mobile responsive” WordPress theme. That is, a theme that is suitable for reading on a smartphone.
To give you an idea, one of our sites is consulted by 91% of mobile users!
➡️ The price of this kind of theme is variable, but it is necessary to count between 50 and 300€ for the most expensive. Some have unique licenses while others allow you to use them on all your projects endlessly.
To give you an idea, you can look at Astra Divi or even GeneratePress .
Finally, you can hire a graphic designer to have your own images on your site. But again, this is not free(and not necessary to start). Otherwise, you can use free images .
➡️ So to sum up, you can launch your own website for less than 100€ per year and add a paid theme if you want.
The 9 steps to create a WordPress website
At Makers, we have listed for you the 9 crucial steps to create your WordPress website. We advise you to follow them in order to avoid making a mistake or an oversight.
Here is the complete plan:
- Step 1: Choose & buy a domain name
- Step 2: Subscribe to a web host
- Step 3: Install WordPress on your host
- Step 4: Understanding the WordPress Interface
- Step 5: Choose a WordPress theme and install it
- Step 6: Make the general settings of the site
- Step 7: Customize the website
- Step 8: Install plugins
- Step 9: Add content
What we propose now is to accompany you on each of them. So fix yourself a nice cup of coffee, and let’s go together! ☕
Step 1: Choose & buy a domain name
Once you have chosen the niche or theme you want to pursue, you need a domain name. We could define it as the postal address of your site… but on the Internet!
To make it clearer, here is our domain name for example :

Do you understand better now? Let’s see now how…
Choose a domain name
As you have understood, the domain name is the identifier of an Internet domain. It’s the first thing your readers will see, so it’s best to make a good impression.
It’s like in relationships, but now we’re getting off track! ✋
Two strategies are popular right now:
- EMD or exact match domain, i.e. having the keyword as a domain name(for example: avis-aspirateur.fr);
- branding, i.e. choosing a unique name that aims to make a mark and become a brand(for example: lesmakers.co ❤️);
There is no right or wrong choice. Both strategies work so it all depends on your project behind it.
👉 If you’re creating a small site to do affiliate marketing on walking sticks, you can choose an EMD ;
👉 If you choose to create a site about mountain walking and all its aspects, a branded name would be a good idea;
Just remember one thing dear Maker: the domain name must be related to the theme. If you have chosen to go with branding, it will be up to you to tell the story behind the name.
Look for example at what we did for the Makers:
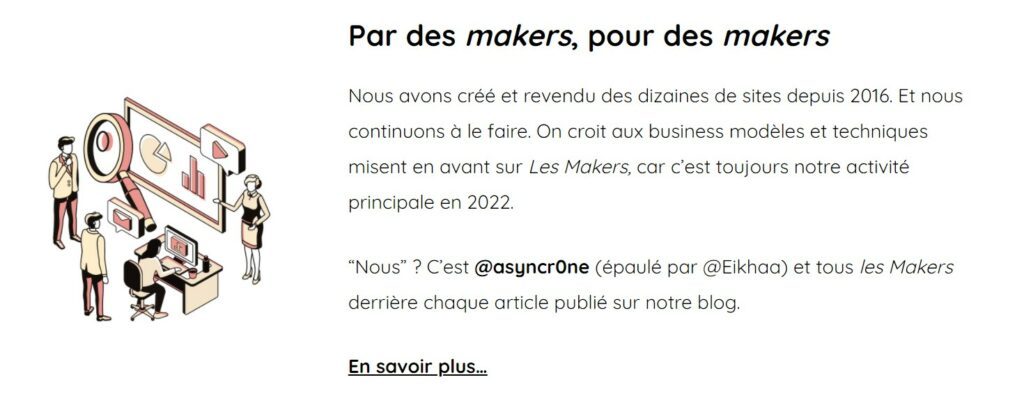
In any case, try to respect these 5 criteria:
- Concise : get to the point;
- Clear : we must understand what you are talking about;
- Unique : create your own brand:
- Memorable : it’s better to remember it easily if you want to come back to it;
- Easy to type: think of your visitor who doesn’t want to take the headache ;
With this, you’re sure not to put a dent in the water! 💪
Once you have chosen it, it is important to…
Check that it is not a brand
To check that the domain name does not include a trademark, you can consult the INPI website .

Just type your domain name(without the .fr or .com extension) and see if a trademark has been registered.
If so, change your mind. It is useless to take the risk of working on your site to lose it later. Because that is the risk of using an existing brand!
No need to play with fire. 🔥
If everything is ok, you may wonder…
Which extension to take?
If you don’t know what it is, we defined it in our On-Site SEO guide as the suffix at the end of the domain name.
It can be in .FR, .COM or .ORG for example.
This means that you can find two different sites with the same name, but a different extension. This is the case for example for jeuxvideo.com and jeuxvideo.fr. 🎮
Concerning the choice, it is not necessary to take the head. Concretely, this will not affect the referencing of the site. So just make sure you take a known extension that your reader can trust.
For example, if your site is aimed at French readers you can choose .FR. If you want to give your site an international feel, you can choose .COM.
Now that you know the basics, let’s get straight to the…
Tutorial to reserve a domain name
⚠️ Don’t apply what we’re going to show you right away. Indeed, it is possible to link the web hosting step with the one concerning the domain name. So read the two steps first before taking action!
To buy a domain name, you just have togo to a specialized site. There are dozens of them, for example ionos.fr, ovhcloud.com or lws.fr.
For our example, we will go to Ionos.fr :
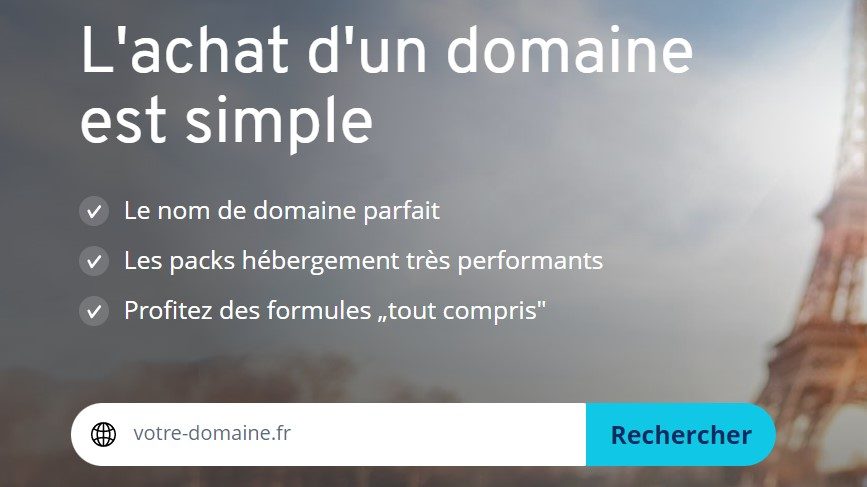
Just type the name you have chosen before clicking on the “search” button.
This is what you will get as a page:

In this case, jesuisunoiseau.fr is available(the opposite would be weird🤔). It even offers you below the other available extensions. If you like it, you can click on the “add” button.
And that’s when you have to pull out your credit card to pay. 💳
When you get your hosting, you will have to transfer this domain name to it. This is not always easy for a beginner, so now discover the second step to find an easier and faster way to do it!
Step 2: Subscribe to a web host
Web hosting can be defined as the provision of a dedicated storage space for the publication of one or more websites.
These are companies with huge servers that offer this kind of service.
But then…
How to choose a web host?
We can separate the hosts according to their services and their rates.
➡️ Among the cheapest and good quality hosts, we can mention O2Switch.

As we have seen before, this service offers :
- an offer at 72€ TTC per year for the mutualized hosting of your websites;
- a free domain name for one year ;
It is moreover a French company, cocorico! 🇫🇷
➡️ If you need a more premium host because your site already has tens of thousands of visitors, you can look at WP Server .
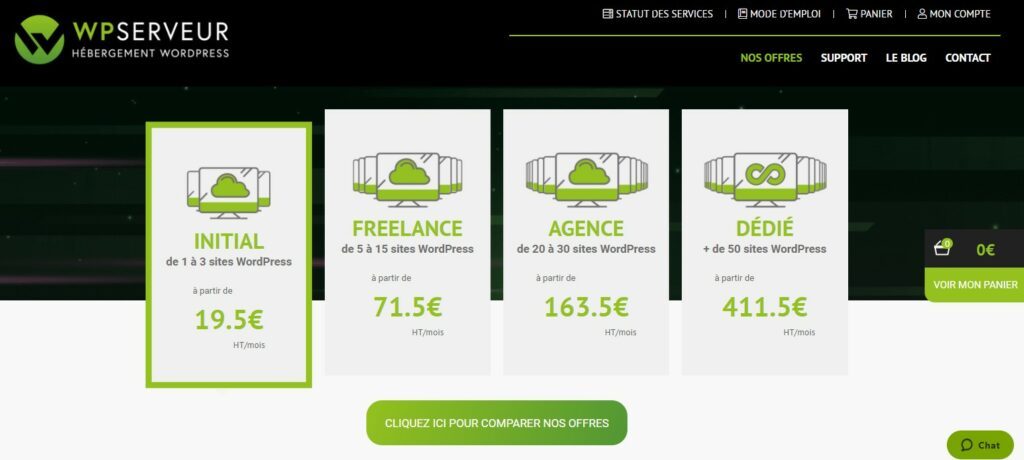
This service offers you :
- faster page loading;
- greater security against hacking attempts;
But as you can see, the price is more important with a cost of 19,5€ HT per month for 1 to 3 WordPress blogs. 💰
Now that you know the different possibilities offered by web hosting companies, let’s move on to the…
Tutorial for subscribing to a web host
In this step, we’re going to make both the domain name reservation in addition to the web hosting. This is the easiest way to start creating your WordPress site.
To do this, you must go to the O2switch website and create an account:
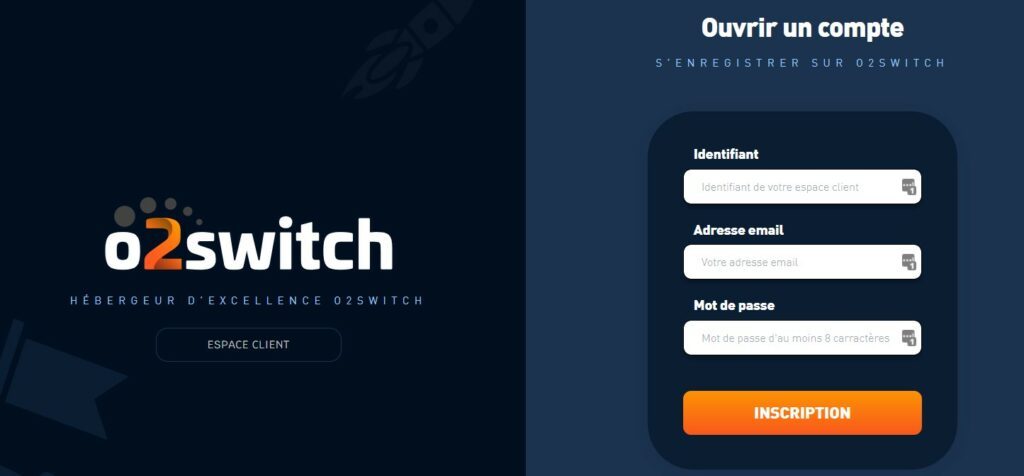
Once you have created and logged into your account, you will click on the button on the left “order a service“:
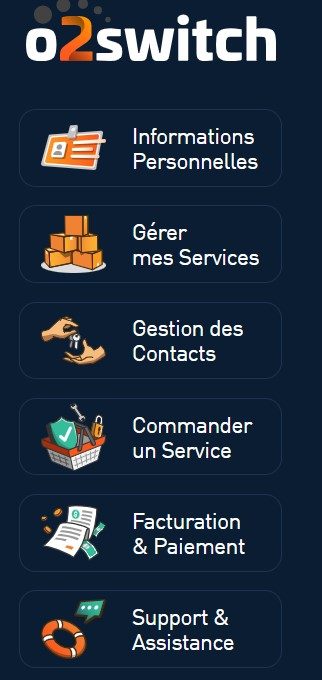
You will arrive on a page proposing you to choose the unique offer(shared hosting + domain name offered) or the purchase of a domain name only.
Click on the unique offer and you will arrive on a page like this one:
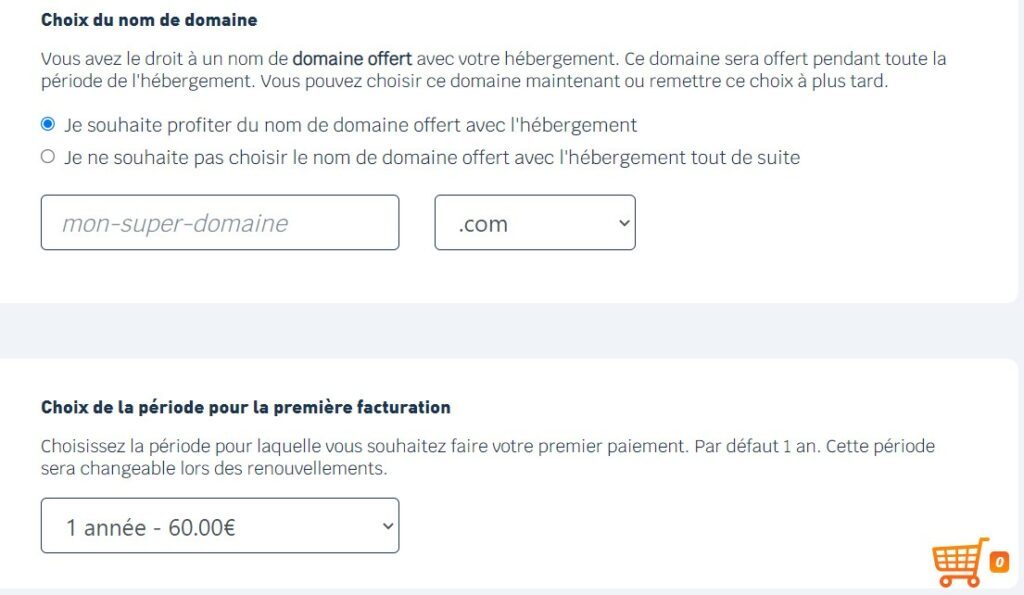
You must indicate the domain name you have chosen and specify its extension. If you have already purchased a domain name elsewhere, check the corresponding box.
You will be asked to pay over one or more years depending on your preference.
And that’s it! ✅
Here you are, renting a space where you can store your future site(s). It’s like a parking lot where you park your Mercedes. 🏎️
In a few minutes you will receive an email with all the elements you need to access this hosting.
It is now necessary…
Step 3: Install WordPress on your host
Once you have obtained your web host and you have uploaded your domain name to it, you now need to install WordPress.
Here is our…
Tutorial to install WordPress on your host
At this point, you should have received an email with everything you need to access your cPanel. It is simply an administration panel to manage your website or web hosting.
Once you log on, you should have this on your screen:
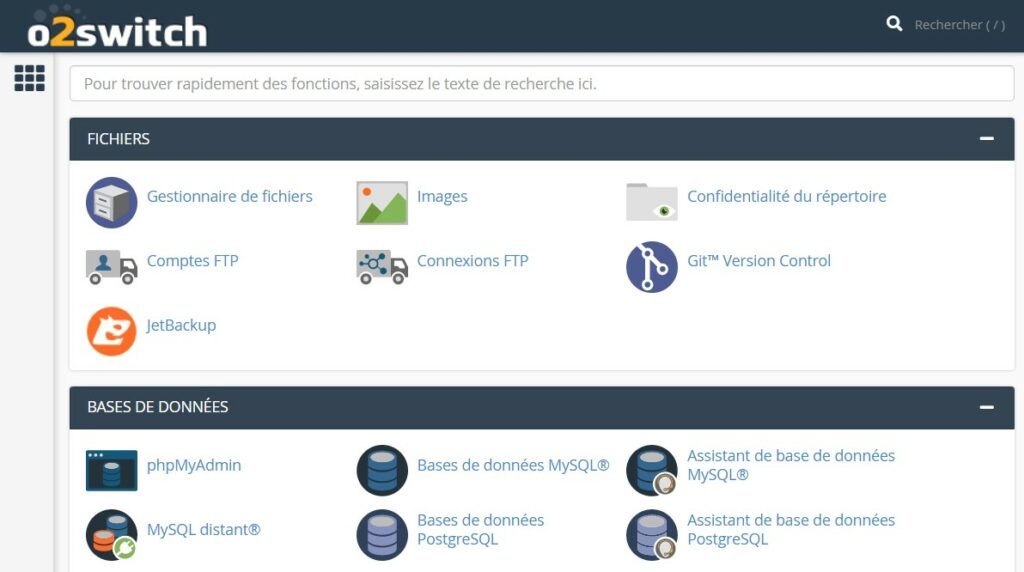
If you have taken the domain name at the same time as the host, you will save time.
If this is not the case, you will have to add the domain name in your host. To do this, you need to go to the “Domains” section and click on “Configured Domains“.
You will be asked to indicate which domain name you want to set up.
Here is an example to show you how to fill out the form:
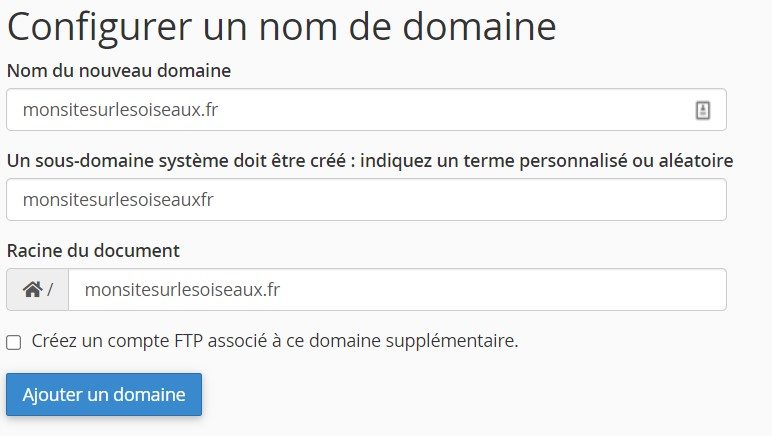
Once this is done, return to the home page. That’s it, you’ve caught up with the others.
Now we’ll install WordPress on your domain name!
This time, you have to click on the “WordPress” button. Little hint: it is located at the very bottom of the page with its big white W on a blue background. 🧐
You will arrive on a page with this header:

You will have to go to the bottom to click on the “install now” button. You will arrive on this page:
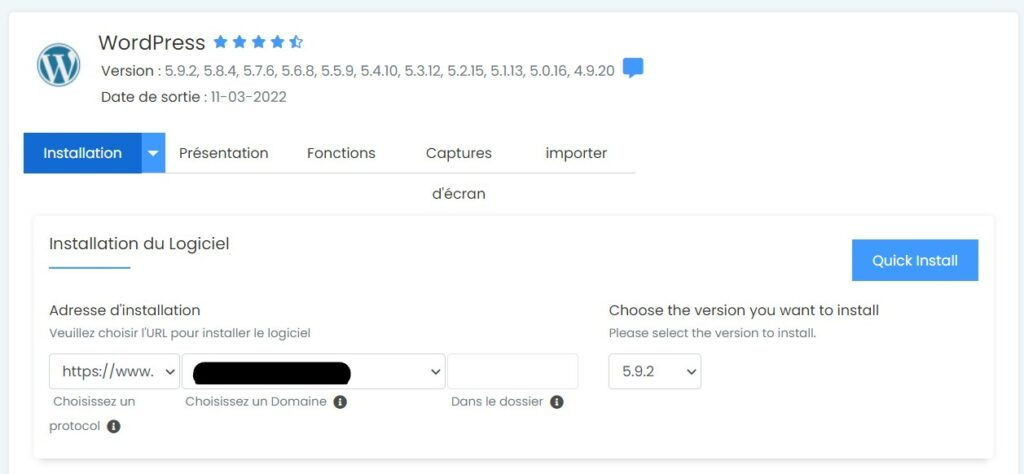
You will have to fill in the domain name on which you want to install WordPress, but also the administrator username and password to connect to your dashboard.
Keep this information carefully, it is very important.
Once you have completed everything, just click on the “Install” button at the bottom of the page to start the process. You will only have to wait a few seconds for the operation to finish.
And there you have it!
Generally, you are given the address to access the dashboard of your site which is: lenomdedomaine.fr/wp-admin/.
Congratulations! 🎉
It is now necessary…
Generate an SSL certificate
The SSL certificate is a digital certificate attached to your website. It guarantees to the Internet users the protection of their data as well as their confidentiality.
This allows you to switch your site to HTTPS and benefit from the little padlock next to the URL like we do for example:

Something to give your readers confidence!
To do this, you must return to the cPanel and click on the “Lets Encrypt SSL” button on the home page:

On this page you will find all the domain names that you have configured on this hosting. And you just have to click on “Generate” next to the one you want to generate an SSL certificate on.
After waiting a few moments, your site will automatically switch to HTTPS!
Create a dedicated mailbox
The last thing to do on the cPanel is to create a mailbox dedicated to your site. It’s not mandatory, but it allows you to separate your private life from your blogging life!
To do this, you need to click on “Email Accounts” on the cPanel homepage.
You will come across this page:

All you have to do is click on the “create” button and choose the domain name on which you want to create this address.
This will allow you to get an email of this type bonjour@monsiteweb.fr.
You will have to choose a password again to connect to this mailbox so keep it safe.
Step 4: Understanding the WordPress Interface
Once logged into your WordPress dashboard, you should get this image:
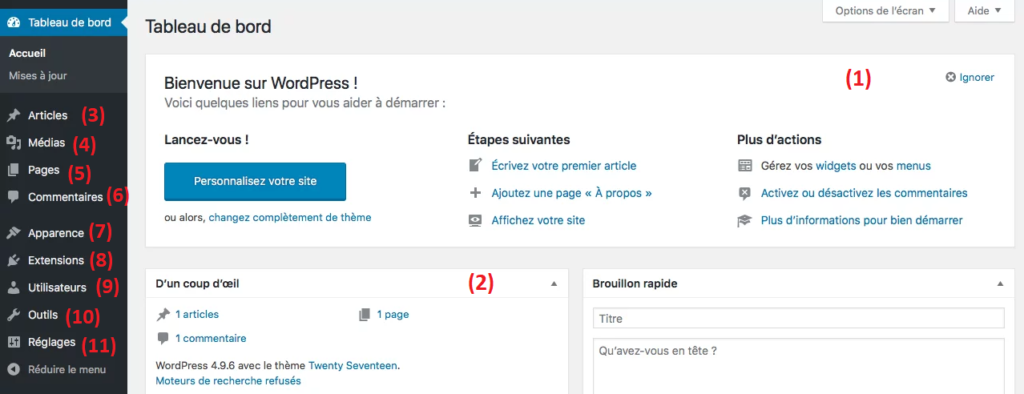
- (1): This insert is simply a welcome message. You will find some shortcuts to write an article, create your menu or activate or deactivate comments.
- (2 ): This part allows you to see at a glance some information about your site, such as the number of articles, pages and comments.
- (3): This is where you will click to write articles in your blog.
- (4 ): Here you can import all the images, files, GIFs or videos that you want to incorporate into your site.
- (5 ): This part allows you to create static pages.
- (6): This box allows you to moderate the comments under your posts in order to validate or reject them according to your wish.
- (7 ): This is where you will be able to adjust all the design aspects of your site. You can even change the theme here.
- (8): Extensions are plugins that you will integrate into the site to perform certain functions. They allow you to integrate a table of contents to each article, speed up the loading of your pages, etc.
- (9): The “users” box allows you to manage who can access your dashboard and what rights you grant them. For example, an editor can create an article, but cannot publish it for security reasons.
- (10): Tools is a general category that allows you toimport or export files easily.
- (11): The settings allow you toaccess the technical part of your site to modify certain aspects such as the permalink, the time format, or the parameters for leaving a comment.
Now that you’ve got the hang of this interface, it’s time to customize your site:
Step 5: Choose a WordPress theme and install it
Now that you have a published site, you can see that it’s not very pretty. 🤢
It’s time to choose a suitable theme to get a more professional look.
But…
Should I use a paid or free theme?
This question is perfectly legitimate, especially since you have just invested a few dozen euros to put your website online.
In fact, there are no official answers: you can very well find a free theme that will meet your expectations. You just have to look at the technical and graphical possibilities before you decide.
➡️ On our side, we still advise you to choose a paid theme.
Why?
Because you will have a paid team behind you that will continue to enrich it. And especially to make it evolve compared to WordPress which is also updated.
If your theme is not up to date with WordPress, it can create technical problems on your site. Or worse. This can create security holes, which is dangerous.
And if you start with a free theme, the volunteer team that takes care of it must continue to bring evolutions from year to year. And we won’t lie: working for free is hardly sustainable in the long run. ❌
In addition, you will have a design generally nicer and especially more functional which is a good thing to differentiate yourself from others.
Whether you start with a paid or free theme, here are some…
The 5 criteria to choose your WordPress theme
You can spend hours looking for THE right WordPress theme. However, this should not become a reason to procrastinate.
That’s why we suggest 5 criteria to check before confirming your choice:
- Popularity: a good number of downloads, many user feedbacks on the Internet, many reviews, etc.
- Security: is the theme regularly updated?
- Functionality: how much can you customize your site? Is everything you want to do on your site possible?
- The design: most themes include templates that you can use to get a professional look in one click. You can often find live demos.
- Responsive mobile: this criterion is eliminatory, more and more Internet users surf the web on their smartphone.
If you don’t want to waste time looking for a good theme, you can look at Astra, GeneratePress or Divi.
Tutorial to install a WordPress theme
As crazy as it may sound, installing a WordPress theme is the easiest step of all those you just did.
To do this, just click on “Appearance” in the sidebar on the left of your dashboard. You will get this page:
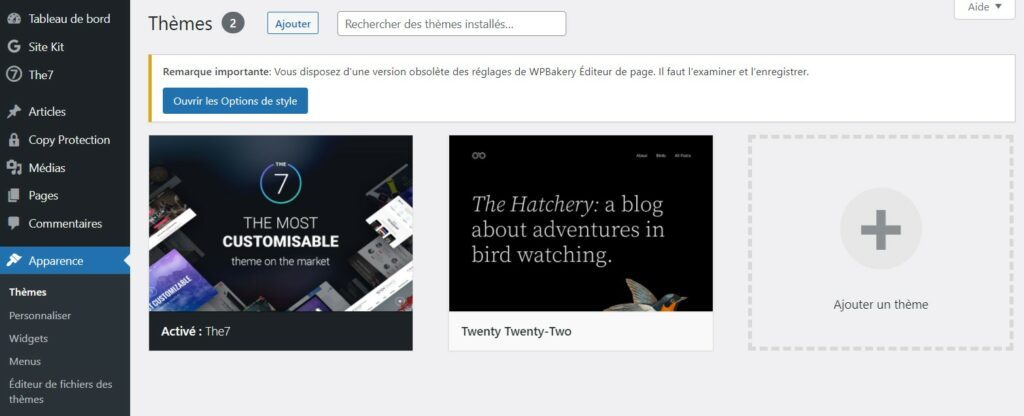
You have two options:
- or click on the “ Add “button at the top to import the file from your computer;
- or click on “ Add a theme “which will offer you the theme catalog from WordPress;
Once you have imported the theme, click on “Activate” to apply it!
Depending on the theme you have chosen, you can then import a specific template. For example, the The7 theme offers over 40 different templates:

Normally, you should have already made your choice so you won’t waste your time among all these proposals.
It is now time to…
Step 6: Make the general settings of the site
We reassure you right away, we are not going to take your head with complicated things. Follow the steps and everything will be fine dear Maker!
Configure general site settings
To do this, click on“Settings” in the left sidebar to get to this page:
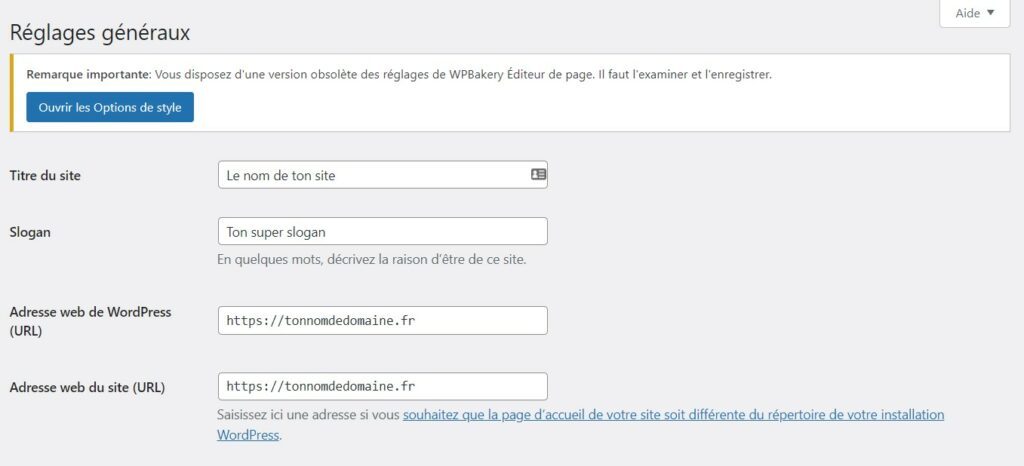
Make sure your website address is HTTPS. Normally this is the case since we have set up the SSL certificate.
Below, you will be able to change the time format on your site, the date format and the weeks:
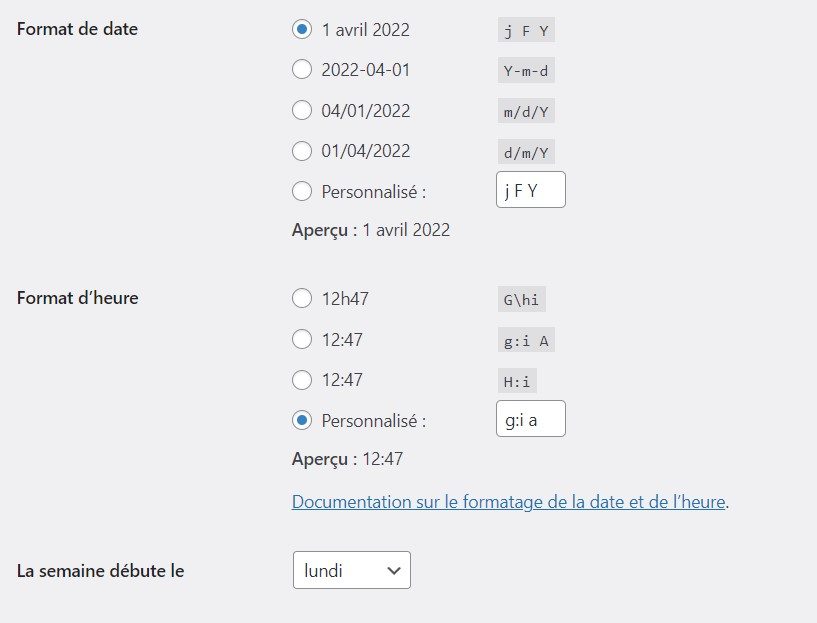
Choose what you want and don’t forget to save the changes by clicking on the button at the bottom of the page.
Now we need to…
Adjusting the permalinks structure
The permalink can be set as a default URL format for articles.
To adjust this, you need to click on “Permaliens” in the“Settings” section. You will get this page:
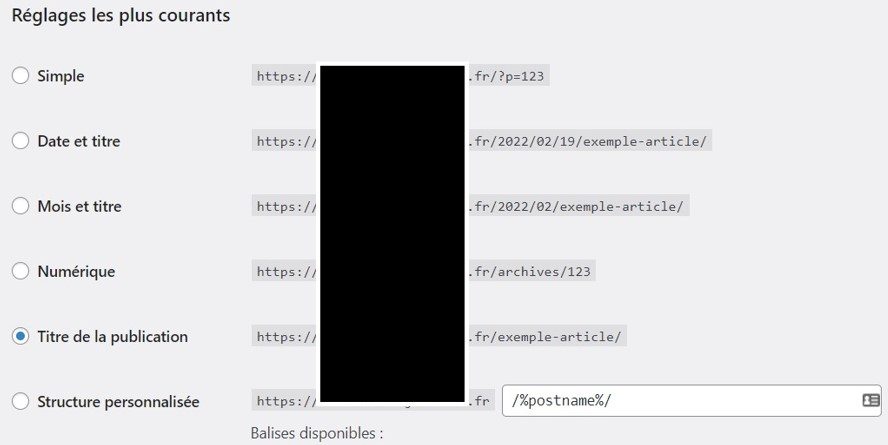
To avoid having long URLs, we advise you to choose “ Title of the publication “and save the changes.
For each published article, the default URL will be: https://www.domaine.fr/nom-de-larticle/.
Of course, you can modify each URL individually, but at least you will have a good structure in case you forget!
That’s it for this part, now you’ll have to choose the right…
Allow or disallow comments under articles
Still in the“Settings” section, but this time in the “Comments” sub-section, you will be able to authorize or not the comments.
Clicking on it, you should get this page:

You just have to check “Allow comments on new posts” to make it possible.
Some editors prefer to leave them disabled since they are tired of having to moderate automatic comments left by bots.
If you go further down this page, you will be able to set up more detailed permission to post comments to protect yourself from this.
It is now time to…
Define a home page and the blog part
For this, there is nothing more simple. Again, go to the “Settings” section and select the “Playback” sub-section.
You will get this page:
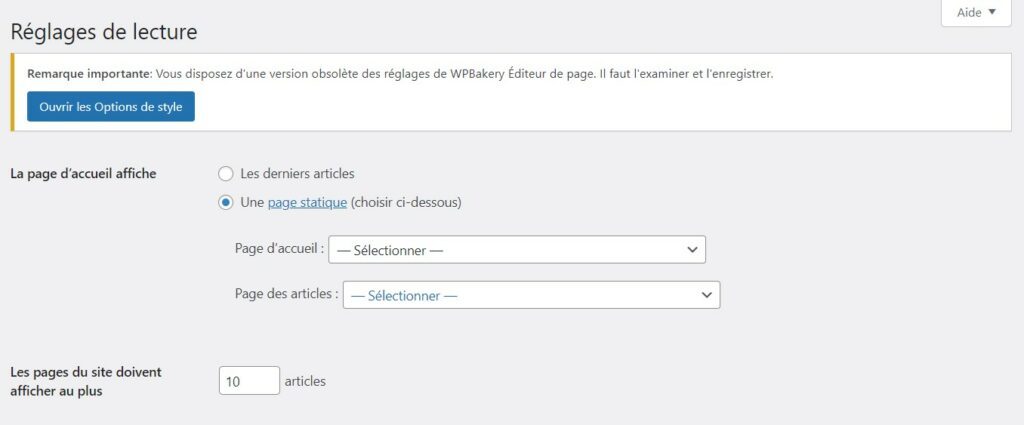
➡️ This is where you can choose if you want your site to be like an online magazine. In this case, you can check that the home page displays the latest posts.
➡️ If you prefer to be in charge and make a nice homepage, you can designate a page that you have to create beforehand.
➡️ Same thing for the page containing all the articles which will become your blog part.
With all this, you have just adjusted the general settings of your site.
Congratulations! 🎉
Let’s go to the part for…
Step 7: Customize the website
Now that you have done the technical part, we will move on to the visual part of your site. This includes fonts, fonts, widgets, site layout, etc.
Let’s start with…
Set the design of the site via the theme
It is difficult to tell you in detail how to do this since it depends on your theme.
However, remember that by clicking on “Appearance” and then “Customize“, you will be able to make changes that you can see live on your site.
You have a sidebar with different options and on the right side your blog that updates every time you make a change so you can see the changes:
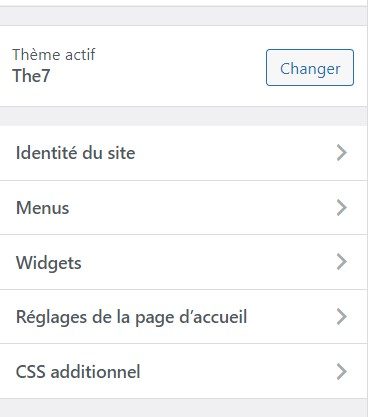
For example, the site identity allows you to change the logo of your site as well as the favicon that we see on the left of the tabs when we are on Google Chrome.
Also, you will find the name of your theme in the left sidebar of your dashboard. By clicking on it, you will be able to modify many visual elements.
Here is an example with The7 :
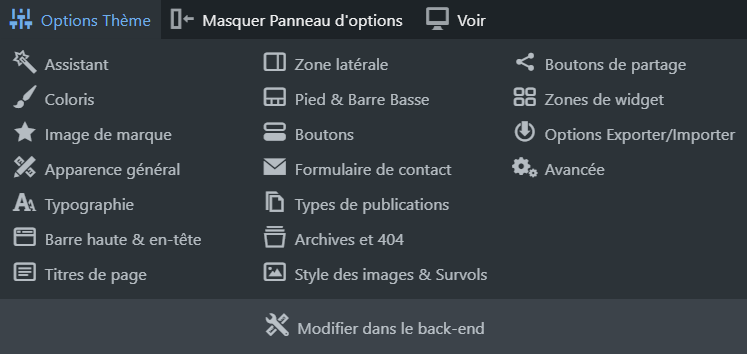
As you can see, you have access to many options to make your website unique.
Once you have completed your modifications, you can…
Change the footer and the sidebar
We can define the footer as the lower part of the page that is often found under all the pages of your site.
It can contain links to direct the visitor, branding to reinforce the “brand” side of your blog or specific elements to reinforce your natural referencing.
You’re totally free on that. 👍
Here is for example the footer of the site jeuxvideo.com:

The sidebar is a column that will be displayed on the left or right side of your page depending on your settings. Again, you are free to include whatever you wish.
You can create different ones depending on the types of pages you have on your site. 👍
For example, here is the sidebar of a blog specialized on dogs, caniprof.com :

As you can see, he takes the opportunity to propose an insurance offer for dogs as an affiliate.
In short.
To change these elements, simply go to the “Appearance” tab of your dashboard, then “Widgets“.
You will get this on the screen:
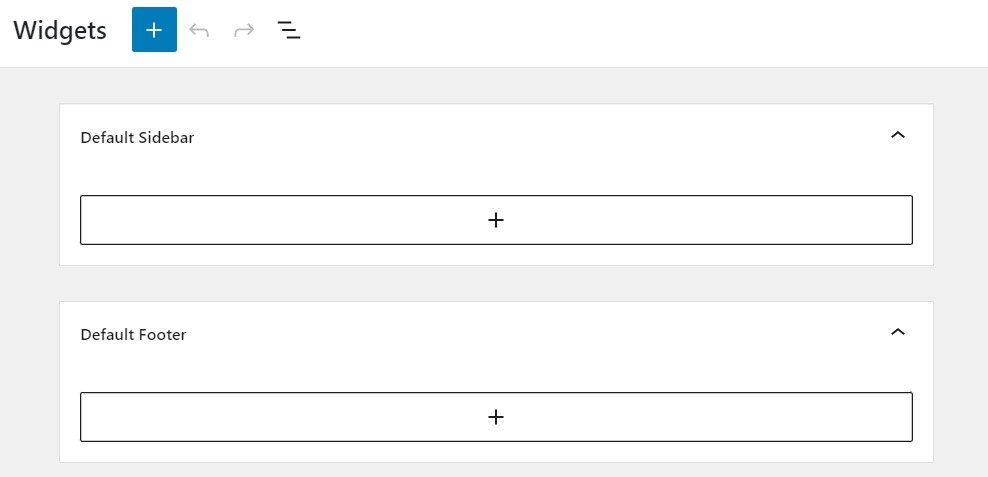
You will only have to click on the “+” to add different elements according to your desires. This can be images, text, videos, etc.
You can even create special ones that you can choose each time you create an article for example.
Let’s move on to the…
Menu creation
To do this, you must go to the tab “Appearance” and then the sub-section “Menus“. You will get this page:
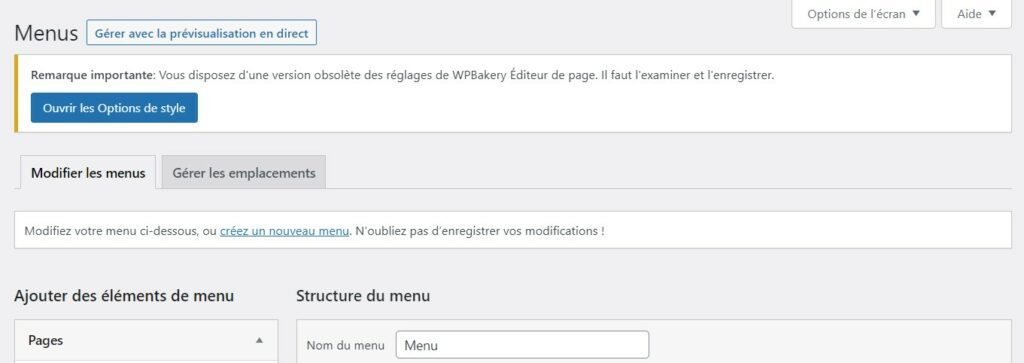
WordPress automatically suggests pages that you have already written, but you are totally free in what you can put in it.
Creating sub-menus is easy!
You just need to nest the pages on top of each other like this:
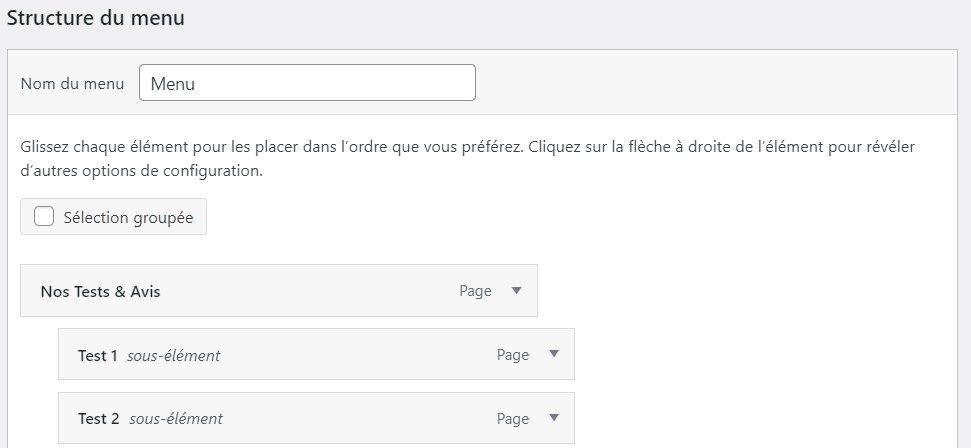
And here it is, your site is now customized! Congratulations! 🎉
You can now…
Step 8: Install plugins
You can define a WordPress plugin as a module that will modify your site to provide some additional features.
There are thousands of them, some paid and some free.
To add them, it is very simple. Just go to the “Extensions” section located in the sidebar of your dashboard. You will get this on the screen:
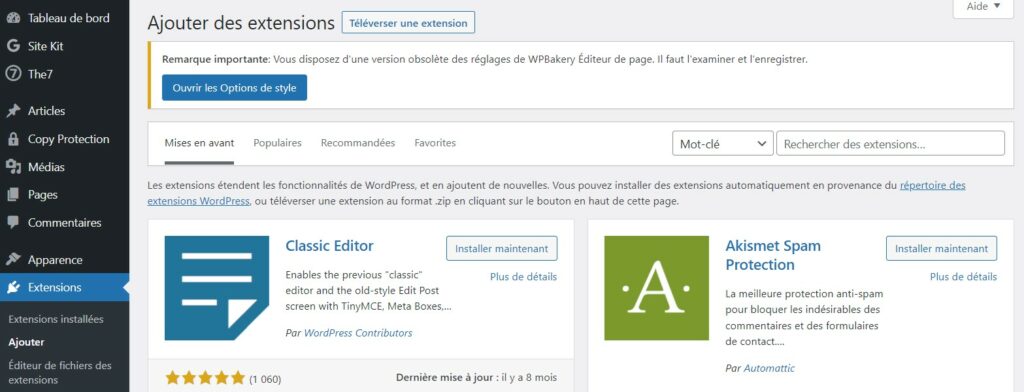
Just type in the search bar the names you are interested in and click on “Install now” to implement them.
Let’s look at the most important ones for you:
Automatic site backup plugin
It is very important to regularly back up your website. This ensures that no data is lost in case of a hack, technical problem or other. This will save you from having to start from scratch!
For this, you can add UpdraftPlus which is free and allows you to set up automatic backups.
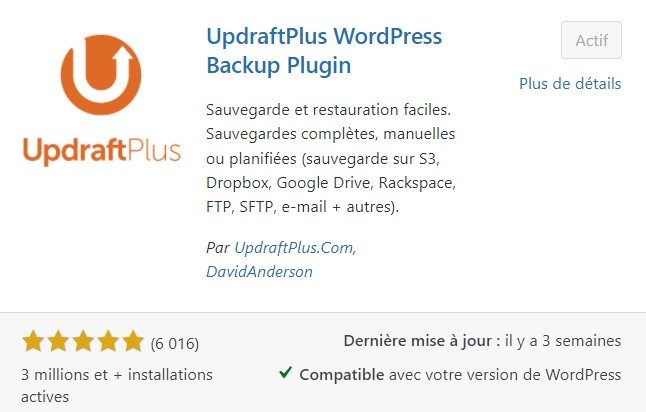
Plugin to boost site speed
The more complicated your blog script is to decipher, the longer your pages will take to display. 😴
That’s why some plugins are specialized inoptimizing your site. Examples include Autoptimize which is free again:
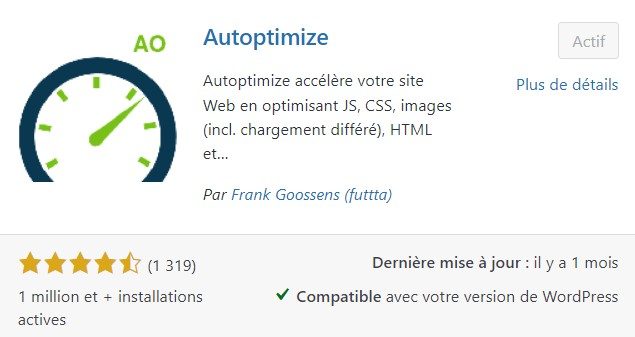
If you want to go to the next level, you can start on WP Rocket which is a paid plugin, but reputed to be more efficient. 💪
Plugin for caching
We can define the cache as a kind of memory that reuses the information it has each time rather than having to load it each time it is visited.
Thus, by avoiding loading, it helps to speed up your website. 🚅
To achieve this result, you can opt for the WP Fastest Cache which is free once again:
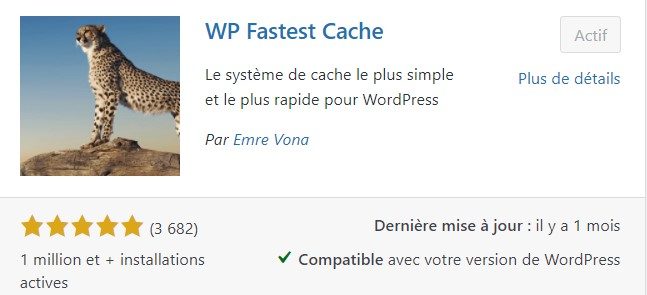
Plugin to manage the sitemap
The sitemap is a file presenting the architecture of a website.
In terms of referencing, it is advisable to provide Google with this sitemap so that it can understand your site and its tree structure more quickly.
For this, you can use the free XML Sitemaps :
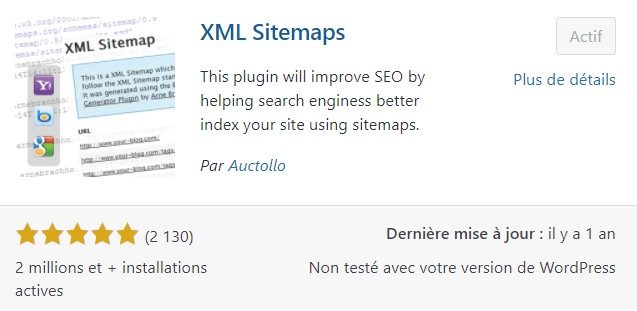
Once generated, you will only have to indicate the link of your sitemap in the Google Search Console. Quite simply!
Let’s move on to the last step, and this is the one that will take you the most time during your blogging life!
Step 9: Add content
According to an old American proverb, “Content is King“, in other words, content is king. You still need to know how to add it to your site! And that’s what you’re going to find out now, dear Maker.
The 3 differences between page and article
As you have seen in the presentation of the WordPress interface, you can publish articles and pages.
Generally, articles are signed by an author, they can be commented, categorized and even dated. For example, this guide is an article.
On the other hand, the pages are intended to remain static. Examples include an About page or a Legal page.
The 3 main differences are that:
- The pages are timeless unlike the articles which are dated
- The articles are included in the RSS feed unlike the pages.
- Pages can be hierarchical while articles will be categorized.
Importing media into the website
To add a personal touch to your content, you can use images, infographics or audio formats.
To do this, you just have to go to the “Media” tab of the sidebar of the dashboard. You will see this on the screen:
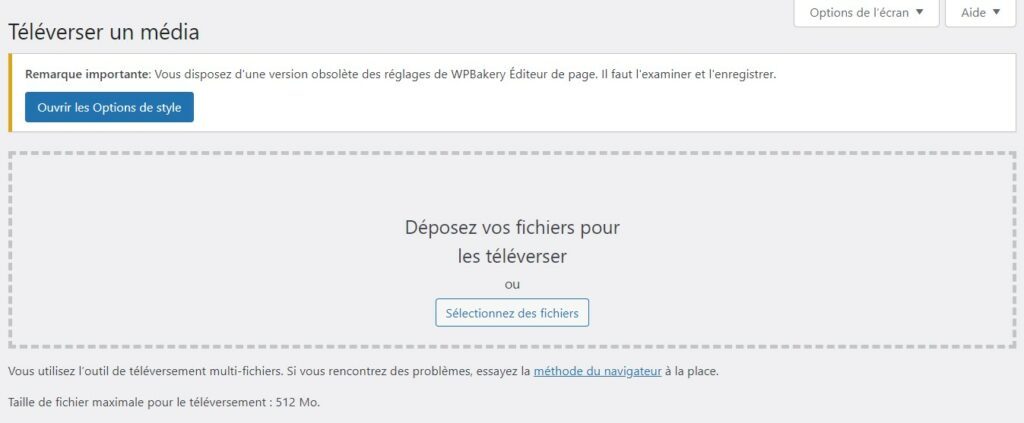
Just drag and drop the items you want to import or click on “Select Files” to do so.
They will be stored in your site’s media library and you will be able to draw on them whenever you need them.
The differences between tags and categories
As you have seen above, you can categorize the articles. And for that, you can use tags as well as categories. But what are their differences?
👉 That’s what we’ll see right away.
The category will allow you to create a theme to group articles. The tag will help refine this organization.
For example, you can create a category “European cuisine” and different tags “French cuisine“, “Italian cuisine“, etc.
Tutorial to add content on WordPress
Whether you write an article or a page, the way of doing it is almost the same. You just have to click on “Add” in the “Page” or “Article” tab depending on what you want to do.
You will get this:
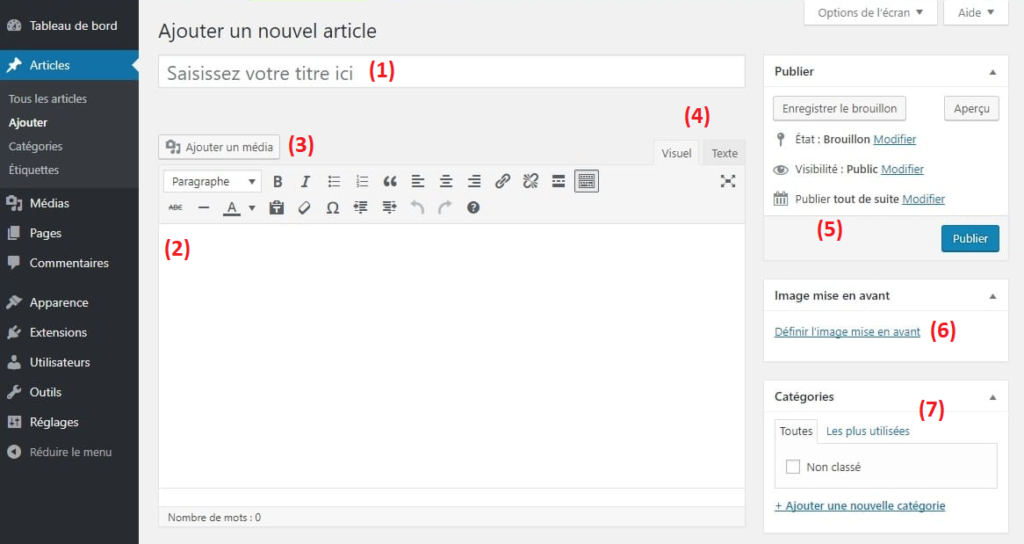
- (1): This is where you can write the headline of your article.
- (2 ): Like a word processor, you can write or paste the text you have already made. This will be the body of your article.
- (3): With one click, you can add media content to your article.
- (4): You can switch between visual or text if you prefer the HTML format.
- (5): This box will allow you to set up the publication of the article according to your wishes.
- (6): The highlighted image will be the one used as a thumbnail when your theme displays all the posts one after the other.
- (7 ): This is where you can choose the category in which you want to put your article, but also the tags you want to put if you want.
Do you realize that?
You now know how to create a WordPress site from A to Z. And if you followed our live advice, you did it!
Congratulations! 🎉
Now you’re probably wondering…
How to attract visitors to your WordPress site?
This question is probably the one that all beginner publishers ask themselves. It’s even one of the goals of Makers: to teach you how to publish a site and monetize it.
Everyone will find his specialty, some will be better in natural referencing, others in the acquisition of traffic via social networks.
This way, readers will discover your site every day(and for free!). Of course, we’ll cover every possible way to attract visitors, so stay connected with us! 😃
If you want to stay in touch with the Makers community, we invite you to fill out the form below.
This will allow you to receive an email to know as soon as a content of this kind has been published on the site. Don’t worry, you won’t be spammed, it’s impossible for us to write this kind of article every day!
As a bonus, you will receive many exclusive tips on how to launch your first online business and earn your first money on the Internet.
Join 10,000+ makers and get all our latest tips for making a living from Blogging and Affiliate Marketing.

